> For the complete documentation index, see [llms.txt](https://docs.poweromni.ai/llms.txt). Markdown versions of documentation pages are available by appending `.md` to page URLs; this page is available as [Markdown](https://docs.poweromni.ai/en/administration-and-configuration/workspaces.md).
# Workspaces
The **Workspaces** menu is an organizational tool that allows you to group Agents (AI assistants) by team, project, or department, making navigation and organization of the user portal easier without necessarily impacting fundamental permissions.
#### Overview
The table displays the Workspaces that have already been created (Ex: Sales, HR, Finance, Admin).
### How to Create and Manage a Workspace
#### 1. Creation
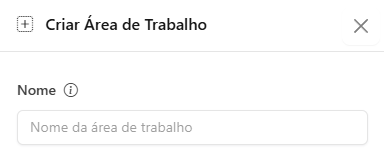
* Click the **Create** button in the upper-right corner.
* Define the **Workspace Name**.
#### 2. Managing Relationships (Organization)
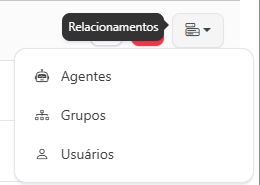
By clicking the actions button (...) next to a Workspace, you access the **Relationships** menu. This is where you define what belongs to that Workspace:
* **Agents:** Link the Agents that will be displayed in this Workspace. For example, the "HR" Workspace should contain the Agents "Internal PC" and "Internal Policies Agent".
* **Users:** Link the Users who will see this Workspace in the navigation menu.
* **Groups:** Link the user Groups that will see this Workspace.
{% hint style="info" %}
### Important Difference:
While Groups control security and access (who can use it), Workspaces control organization and visibility (where the Agent appears). Use them to make the interface cleaner for the end user.
{% endhint %}