> For the complete documentation index, see [llms.txt](https://docs.poweromni.ai/llms.txt). Markdown versions of documentation pages are available by appending `.md` to page URLs; this page is available as [Markdown](https://docs.poweromni.ai/en/pre-installation-guide.md).
# Pre-Installation Guide
### Objective
Ensure the minimum required permissions in Microsoft Azure to install Power Omni.
### What Will Be Configured:
1. Enable **“Access management for Azure resources”** ✅
2. Grant the **Owner role** on the subscription where resources will be created ✅
3. Register the required **Resource Provider(s)** ✅
***
### 1- Portal Access
1. Go to: [portal.azure.com](https://portal.azure.com/)
2. Sign in with an administrator account.
***
### 2- Enable “Access management for Azure resources”
1. In the left menu, select **Microsoft Entra ID**.
2. On the Microsoft Entra ID page, click **Manage** and then access **Properties**.
3. Locate **Access management for Azure resources**.
4. Make sure it is set to **Yes**.\
If it is set to No, change it to **Yes** and click **Save**.
***
### 3- Assign the Owner Role to the Subscription
1. At the top of the portal, search for **Subscriptions**.
2. On the Subscriptions page, select the desired subscription.
3. Within the selected subscription, go to **Access control (IAM)** ➜ **Check access**, and search for the user’s email.
4. Verify whether the user already has the **Owner** role.
5. If the user already has the Owner role, proceed to Step 4 (Resource Providers).
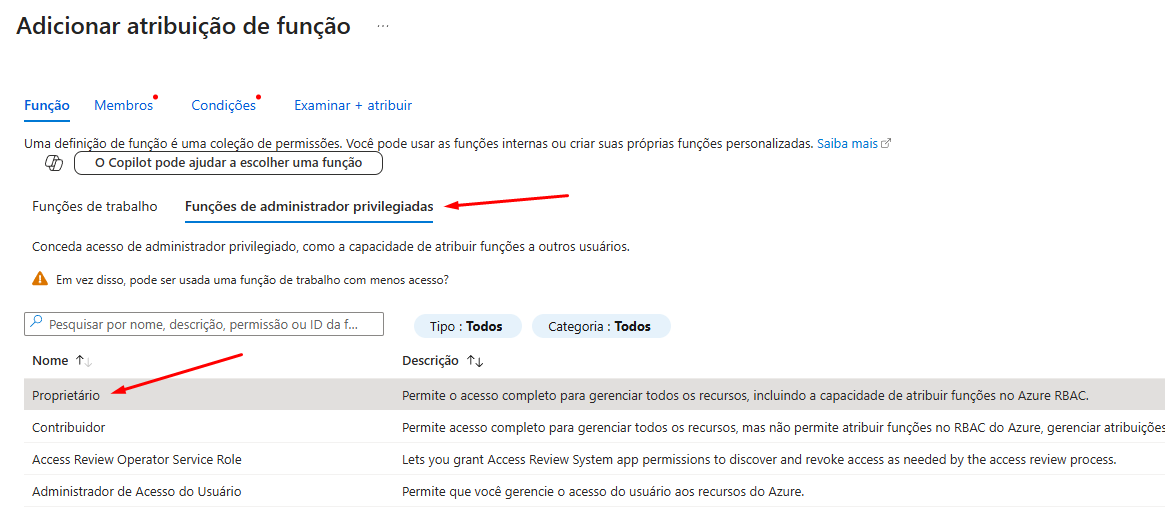
6. If not, click **+ Add** ➜ **Add role assignment**.
7. Under **Role**, select **Owner**, then click **Next**.
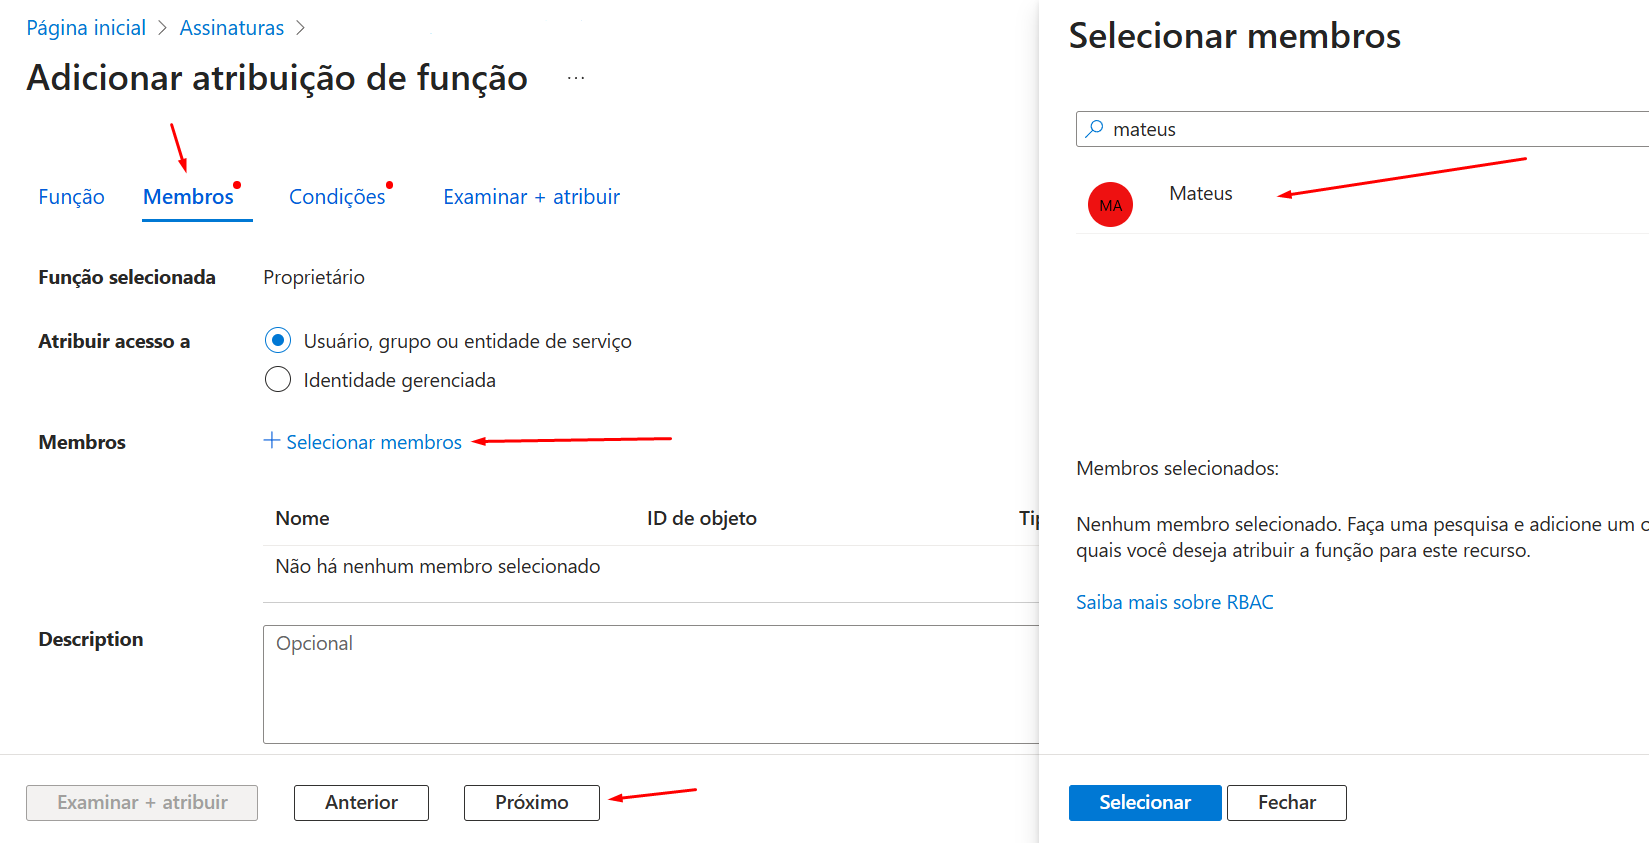
8. Under **Members**, click **Select members**, search for the installer user, and select them.
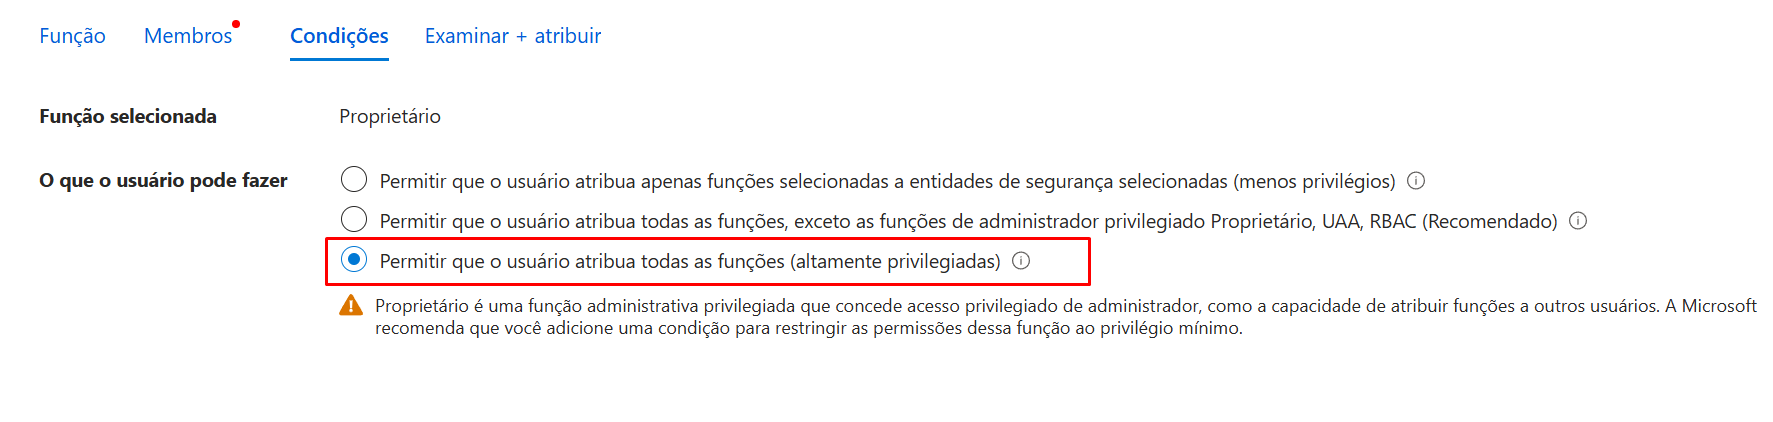
9. Under **Conditions**, keep the default option selected:\
**Allow user to assign all roles**.
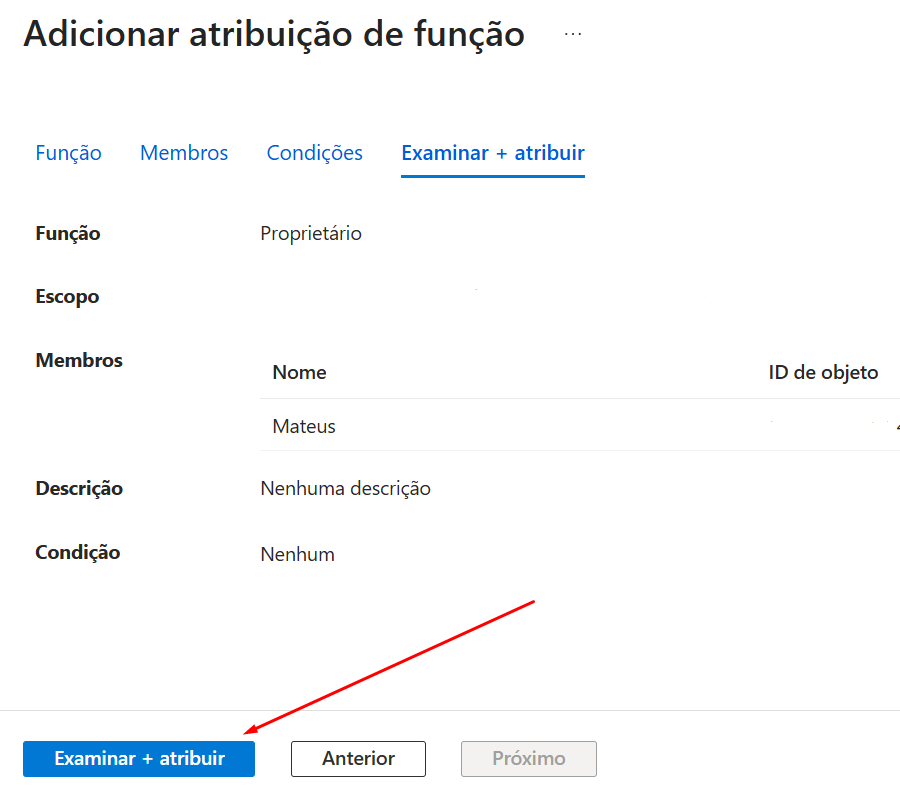
10. Click **Review + assign** to complete the process.
### 4- Verify Resource Provider
1. Inside your subscription, click **Settings** ➜ **Resource providers**.
2. Search for **Machine** and locate the provider **Microsoft.MachineLearningServices**. It must be registered.
3. If it is not registered, click the three dots and select **Register**.
{% hint style="success" %}
### Done
After completing these steps, the Power Omni installation can proceed.
{% endhint %}
{% hint style="danger" %}
## Important Note
**●** This pre-installation process must be completed at least **20 minutes before the official installation**, due to Microsoft’s permission propagation time.
{% endhint %}